

How to Create a Plan
The Plans feature in Degree Works helps advisors and students organize future coursework by creating a semester-by-semester academic plan. Plans can be built from a blank template or an MSU degree template to monitor progress toward graduation. Graduate Students submit a program of study in MyMSU and do not use the plans feature in any official capacity.
Creating or building a Plan in Degree Works
- Navigate to MyMSU
- Click on "Log in to MyMSU (NetID)" and login to the secure area using your NetID and password
- Click on “Advisor Tools”
- Click on “Degree Works for Advisors”
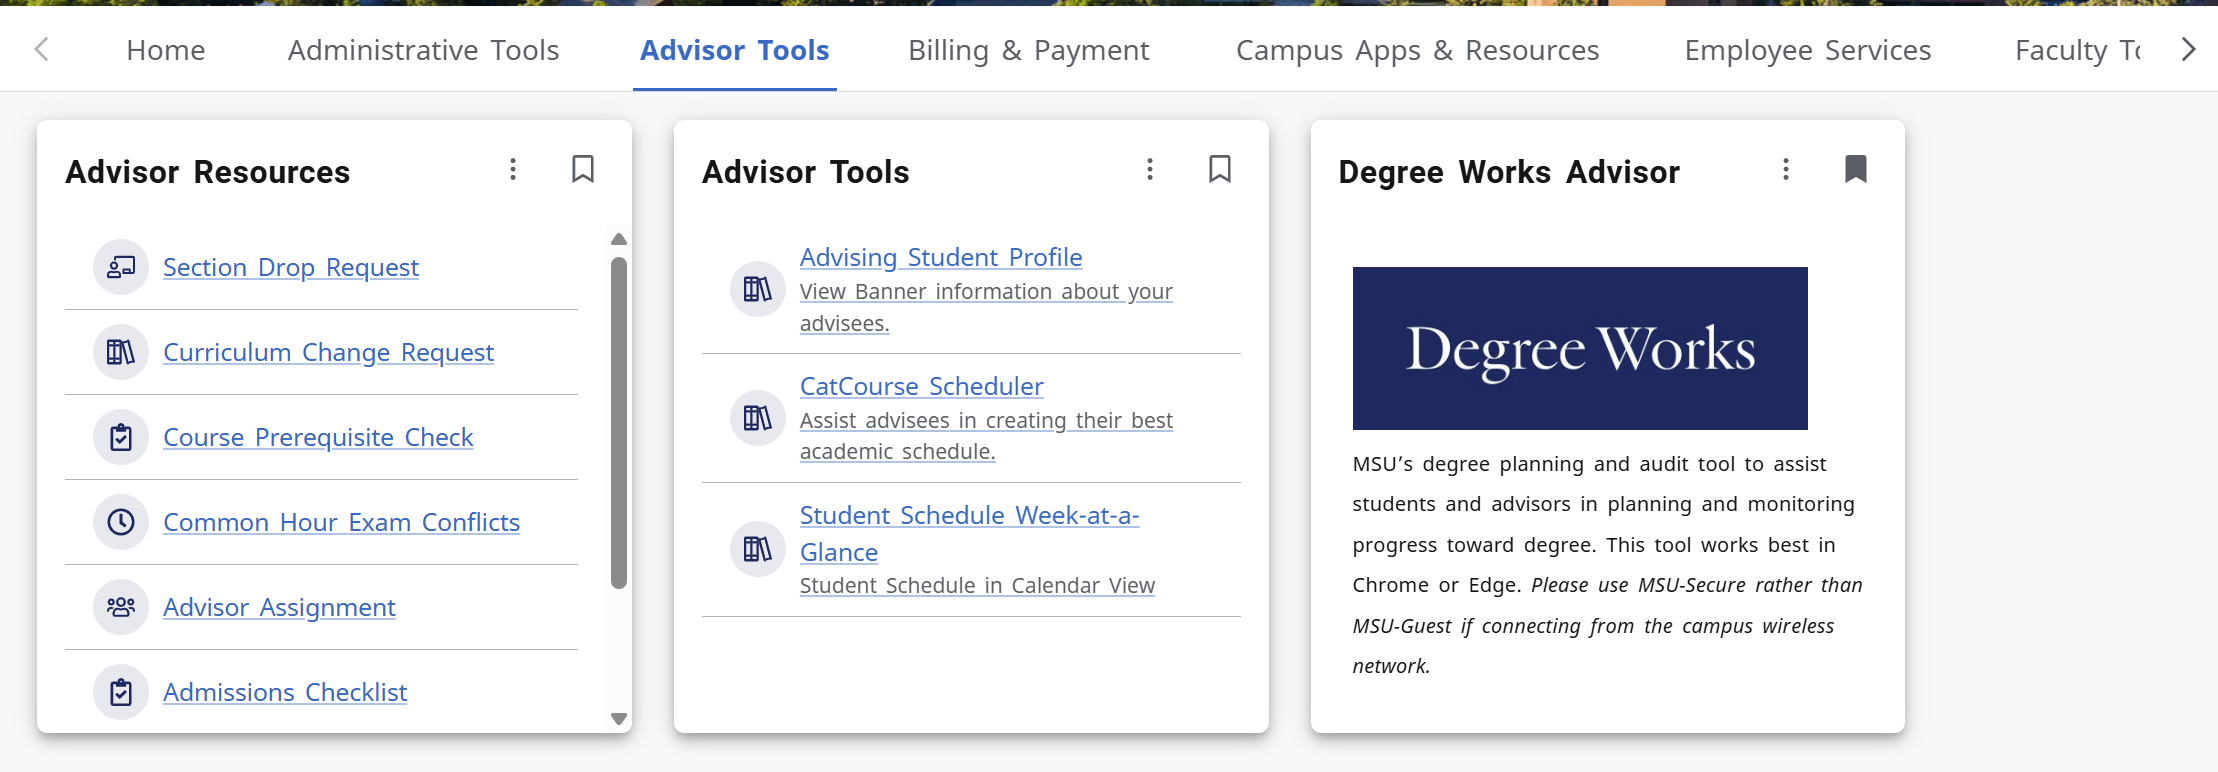
- To begin using Plans, click on “Plans” located in the top left of the Degree Works
worksheet

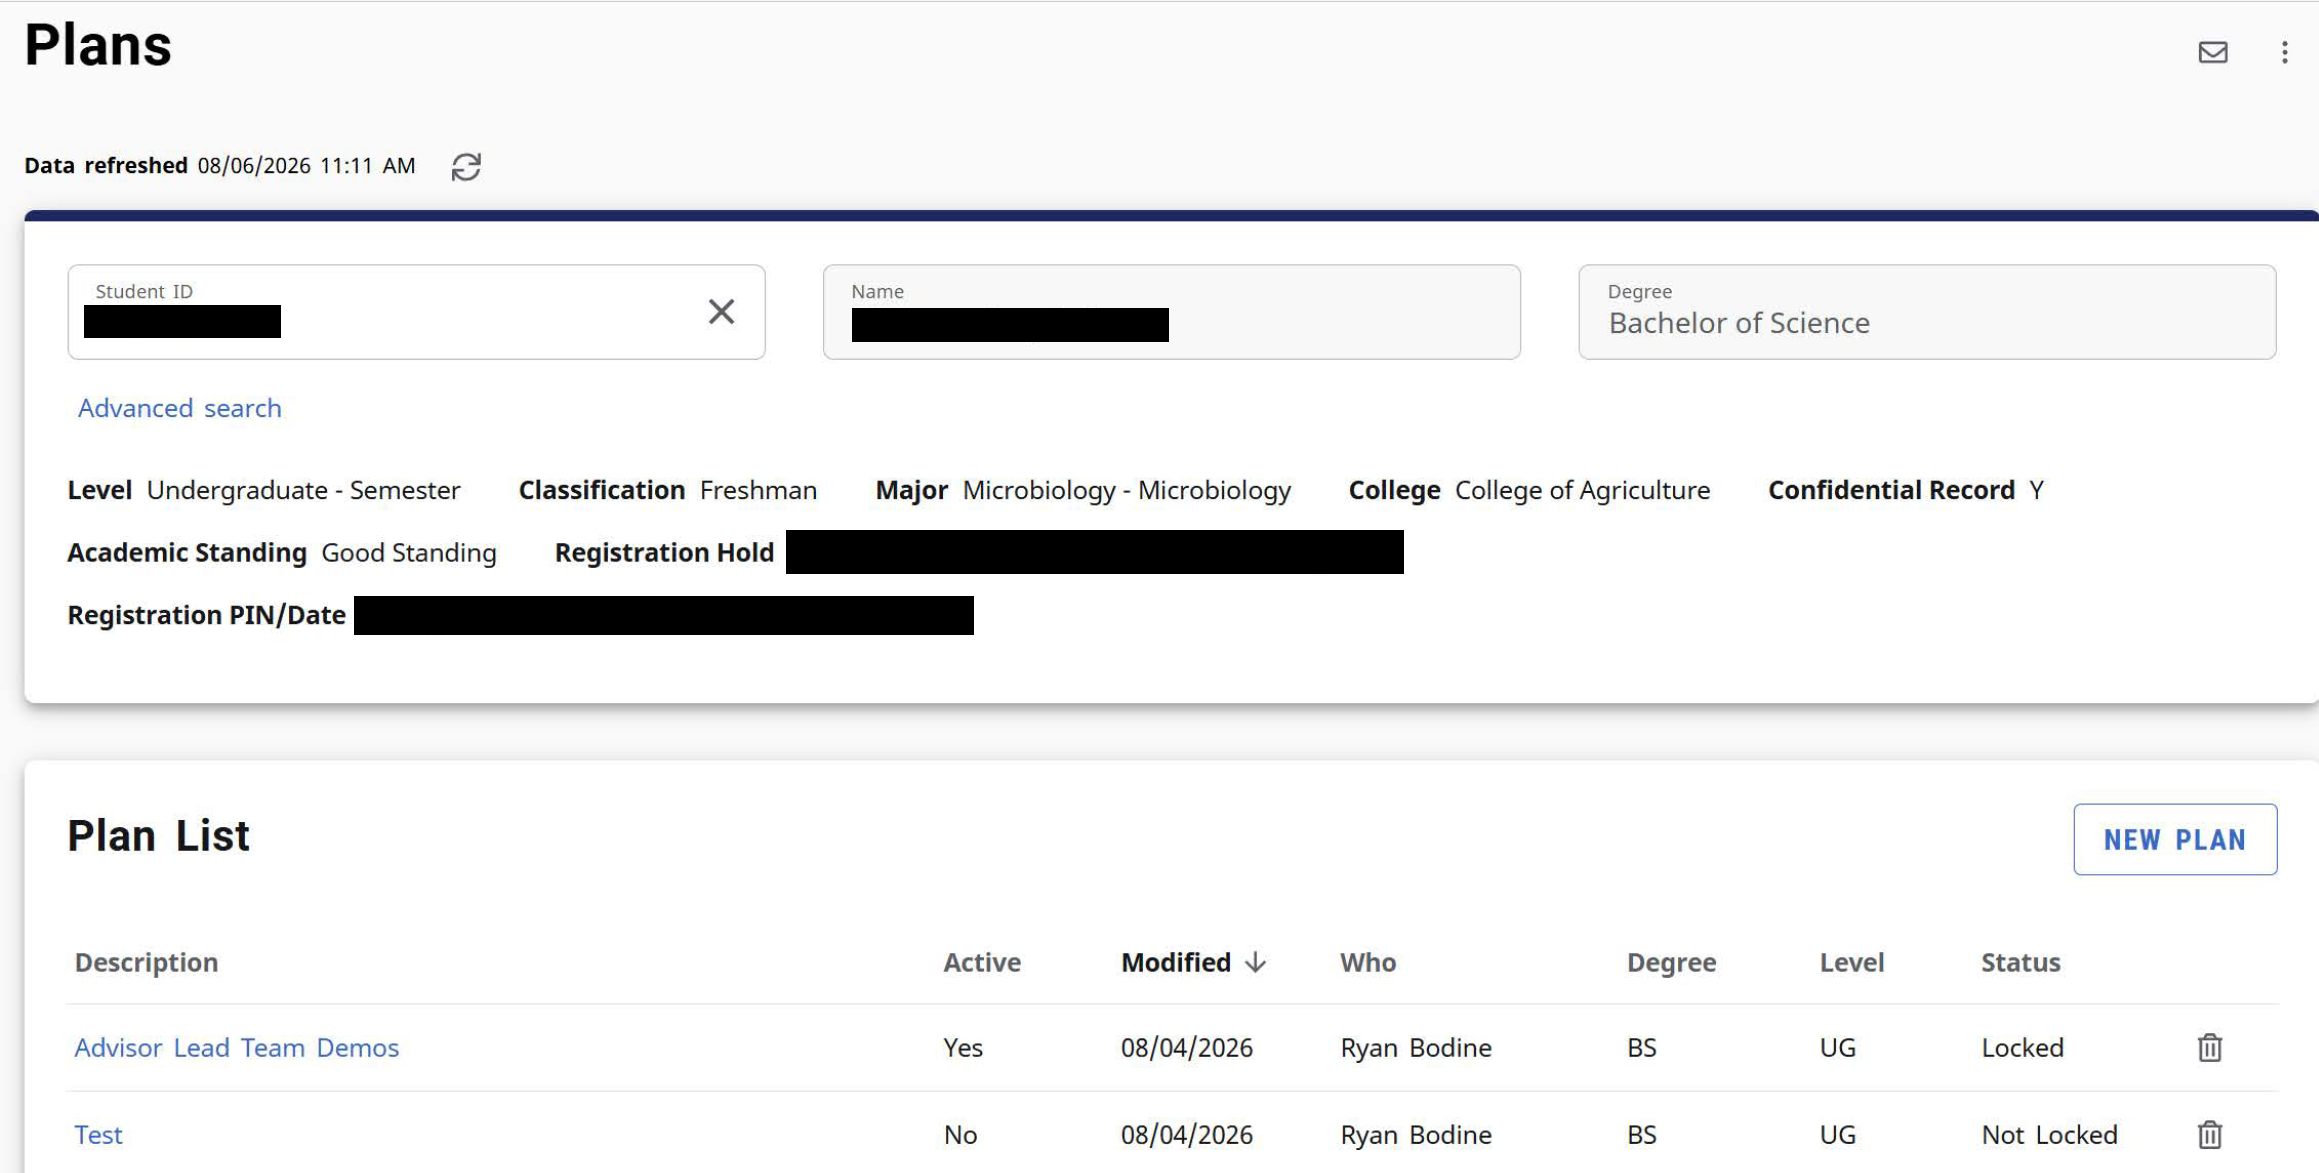
- Enter the Student’s GID or search for a student using advance searchand push ‘return.
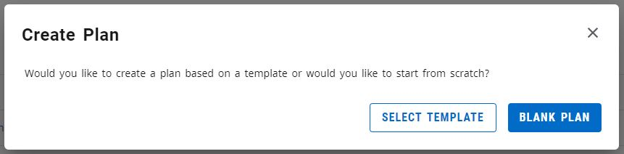
- If there is an existing Plan(s), they will be listed under the “Plan List”. You may edit an existing Plan by highlighting it and double-clicking to open it.If you wish to create a new Plan either from scratch or from a template, select “New Plan”.
Plan Types
There are two different options when creating a new plan, Blank Plans and Templates.
Blank Plans allow you to build a customized plan from scratch.
Templates allow you to select a pre-defined template with courses and semesters already added. Note: You can still edit a plan if selected from a Template. Templates are used when a major at MSU has been officially designated, and the student wishes to import the 4-year degree program for that major into their Plan.
Templates are used when a major at MSU has been officially designated, and the student wishes to import the 4-year degree program for that major into their Plan.

Selecting a Template
To select a template from the list of MSU’s degree programs, you can scroll through the list of templates to find the appropriate one or enter a keyword or phrase in the ‘Search by Template Description’ box, and/or choosing a starting term. Notice that many Templates have multiple Math starts. Upon finding the appropriate template, double click on it to open.
Next, you will be prompted to select a starting term. Choose the term for which you would like the degree program to begin, then click “Submit”.
Note: most templates are intended to begin in the Fall semester.
Navigating the Generated Plan
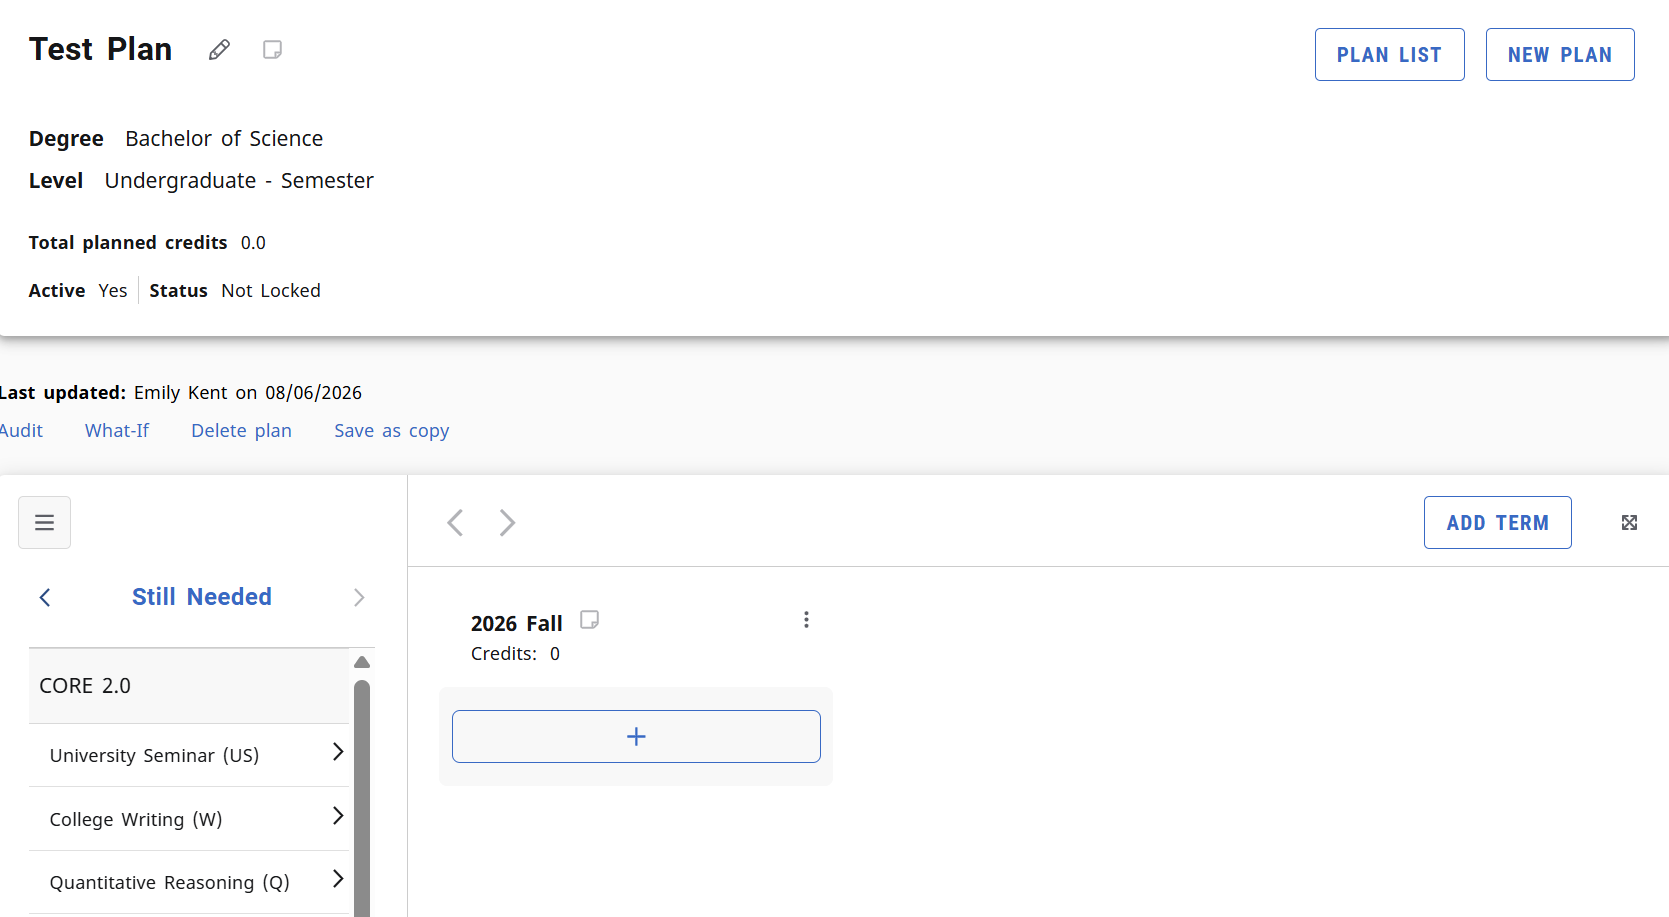
The 'Still Needed' section on the left displays courses the student still needs to complete to receive a degree. The center of the screen displays plans for subsequent terms to graduation. You can add a term by pressing the 'Add Term' button.
You may also perform an Audit or What-If, or Delete or Save a Copy of the Plan via the navigation bar just above the plan to display section.
Editing/Personalizing a Template
Templates are the department’s recommended order of courses to take each term. However, once a template has been selected in Degree Works Plans, as it appears below, it can now easily be edited and personalized for the student.
To move existing courses into another term, simply move your cursor to the blank area directly surrounding a requirement (shown in blue), then click and drag the entire line to the desired term.
To add new requirements to the term, you can select a requirement from the term’s + icon, or you can click and drag specific courses from the Still Needed or Master course lists on the right side of the screen into the term.
To delete a requirement from a term, click on the appropriate requirement until it is highlighted in blue, then click the "minus" icon.
When creating a Blank Plan, first enter the starting term. Subsequent terms can be entered after creating the first, starting term. Push ‘submit.’ Enter a description of the Plan, then toggle if the plan will be active or locked. Be sure to Save the Plan periodically.
Later you can choose to activate the plan by clicking the pencil icon next to the title of the plan.
Adding Requirements to Plan
Once you have selected a term and entered a description for the Plan, the Plan you just created will be added to your Plan List. You are ready to begin adding requirements to the term. Requirements are added by selecting the toggle next to each course and pushing the ‘Add to Plan’ button. You can shift between a list of all Courses, and Still Needed courses via the tabs at the top of the Add Requirements page. The Courses tab will reveal a drop-down menu of subjects, and will allow you to search by title. The Still needed tab will categorize all courses under the major and minor degree blocks, providing a list of classes to choose from.
To leave the Adding Requirements page, click the X on the upper right corner.
Advisors can add notes to an individual requirement within a term, to the term, or to the entire Plan. Note: students can view notes but cannot enter notes themselves.
Advisors: To add a note, click on the "page" icon to open it, then click “Add Note”. Upon completing the note, click “Done”. When a note is entered, the solid "page" icon turns one with lines and can be opened by an advisor or student to read fully, or hovering over it will display the first few words of the note.
Back on the Plans homepage, the Notes view displays a summary of all notes entered for that Plan.
Pre- or Co- Requisite Errors
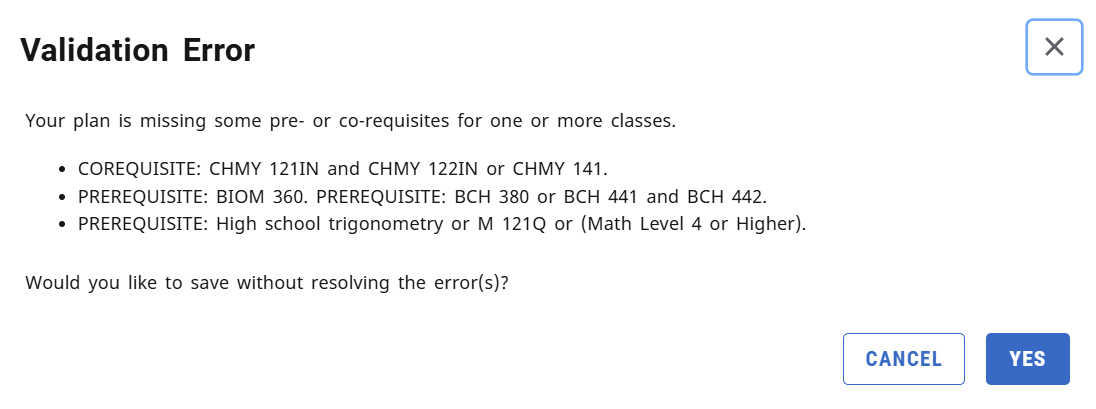
If the Plan is missing some pre- or co-requisites for one or more courses, this Validation Error will appear upon clicking Save:
As the error message states, you can click ‘Cancel’ to go back into the Plan to see which courses within the Plan have missing pre- or co-reqs and resolve the error. Or, an advisor can continue without resolving the error by clicking OK. Note: students don’t have the ability to save their Plan without resolving pre- or co-req errors; they must resolve the error before being able to save.
Note for Students: Degree Works does not recognize courses on a Choice Requirement as courses that are Planned to be taken, so the Validation Error will also appear if a pre- or co-requisite is listed as a Choice.
To resolve this error, double-click to open the Choice Requirement, then select one of the choices by clicking the appropriate radial button, then click “Done”. The Plan will now indicate the selected choice, but the choices still appear if you change your mind later. Now you can Save the Plan without pre- or co-req errors.
Auditing a Plan
Audit from the Plan is a way to ensure the requirements entered the Plan to match what is required for the degree program. Planned courses will say PLAN under the Grade Column on the Plan Audit.
Note: A Plan Audit cannot be saved; the student worksheet remains the most accurate checklist of requirements.
Locking a Plan
The toggle to Lock a plan can be found by clicking the ‘pencil’ (Edit Plan) button next to the Plan title.
An advisor can ‘Lock’ a Plan. Use the Locked check box if you want to Lock this Plan for advising records and prevent a student from being able to alter it. Also, locking and activating a Plan will allow the Plan to be sent to Cat Course where the student will register for courses.